Staging areas (office)
What this is
A staging area is a marked spot, usually a table or a patch of floor, where a picker sets a finished order down for the packer. This page covers the office's part: creating the areas, printing their placards, and reading the Staging areas panel on the Ship station. The panel lets you match the stacks you can see on the floor to their orders.
Before you start
- Role: Office or Administrator. Creating or changing locations needs permission to edit inventory.
- Settings: none. Staging switches itself on as soon as one active staging-type location exists. With none, pickers skip the staging step entirely.
- You'll need: a place on the floor for each area, and a printer for the placards.
Step by step
-
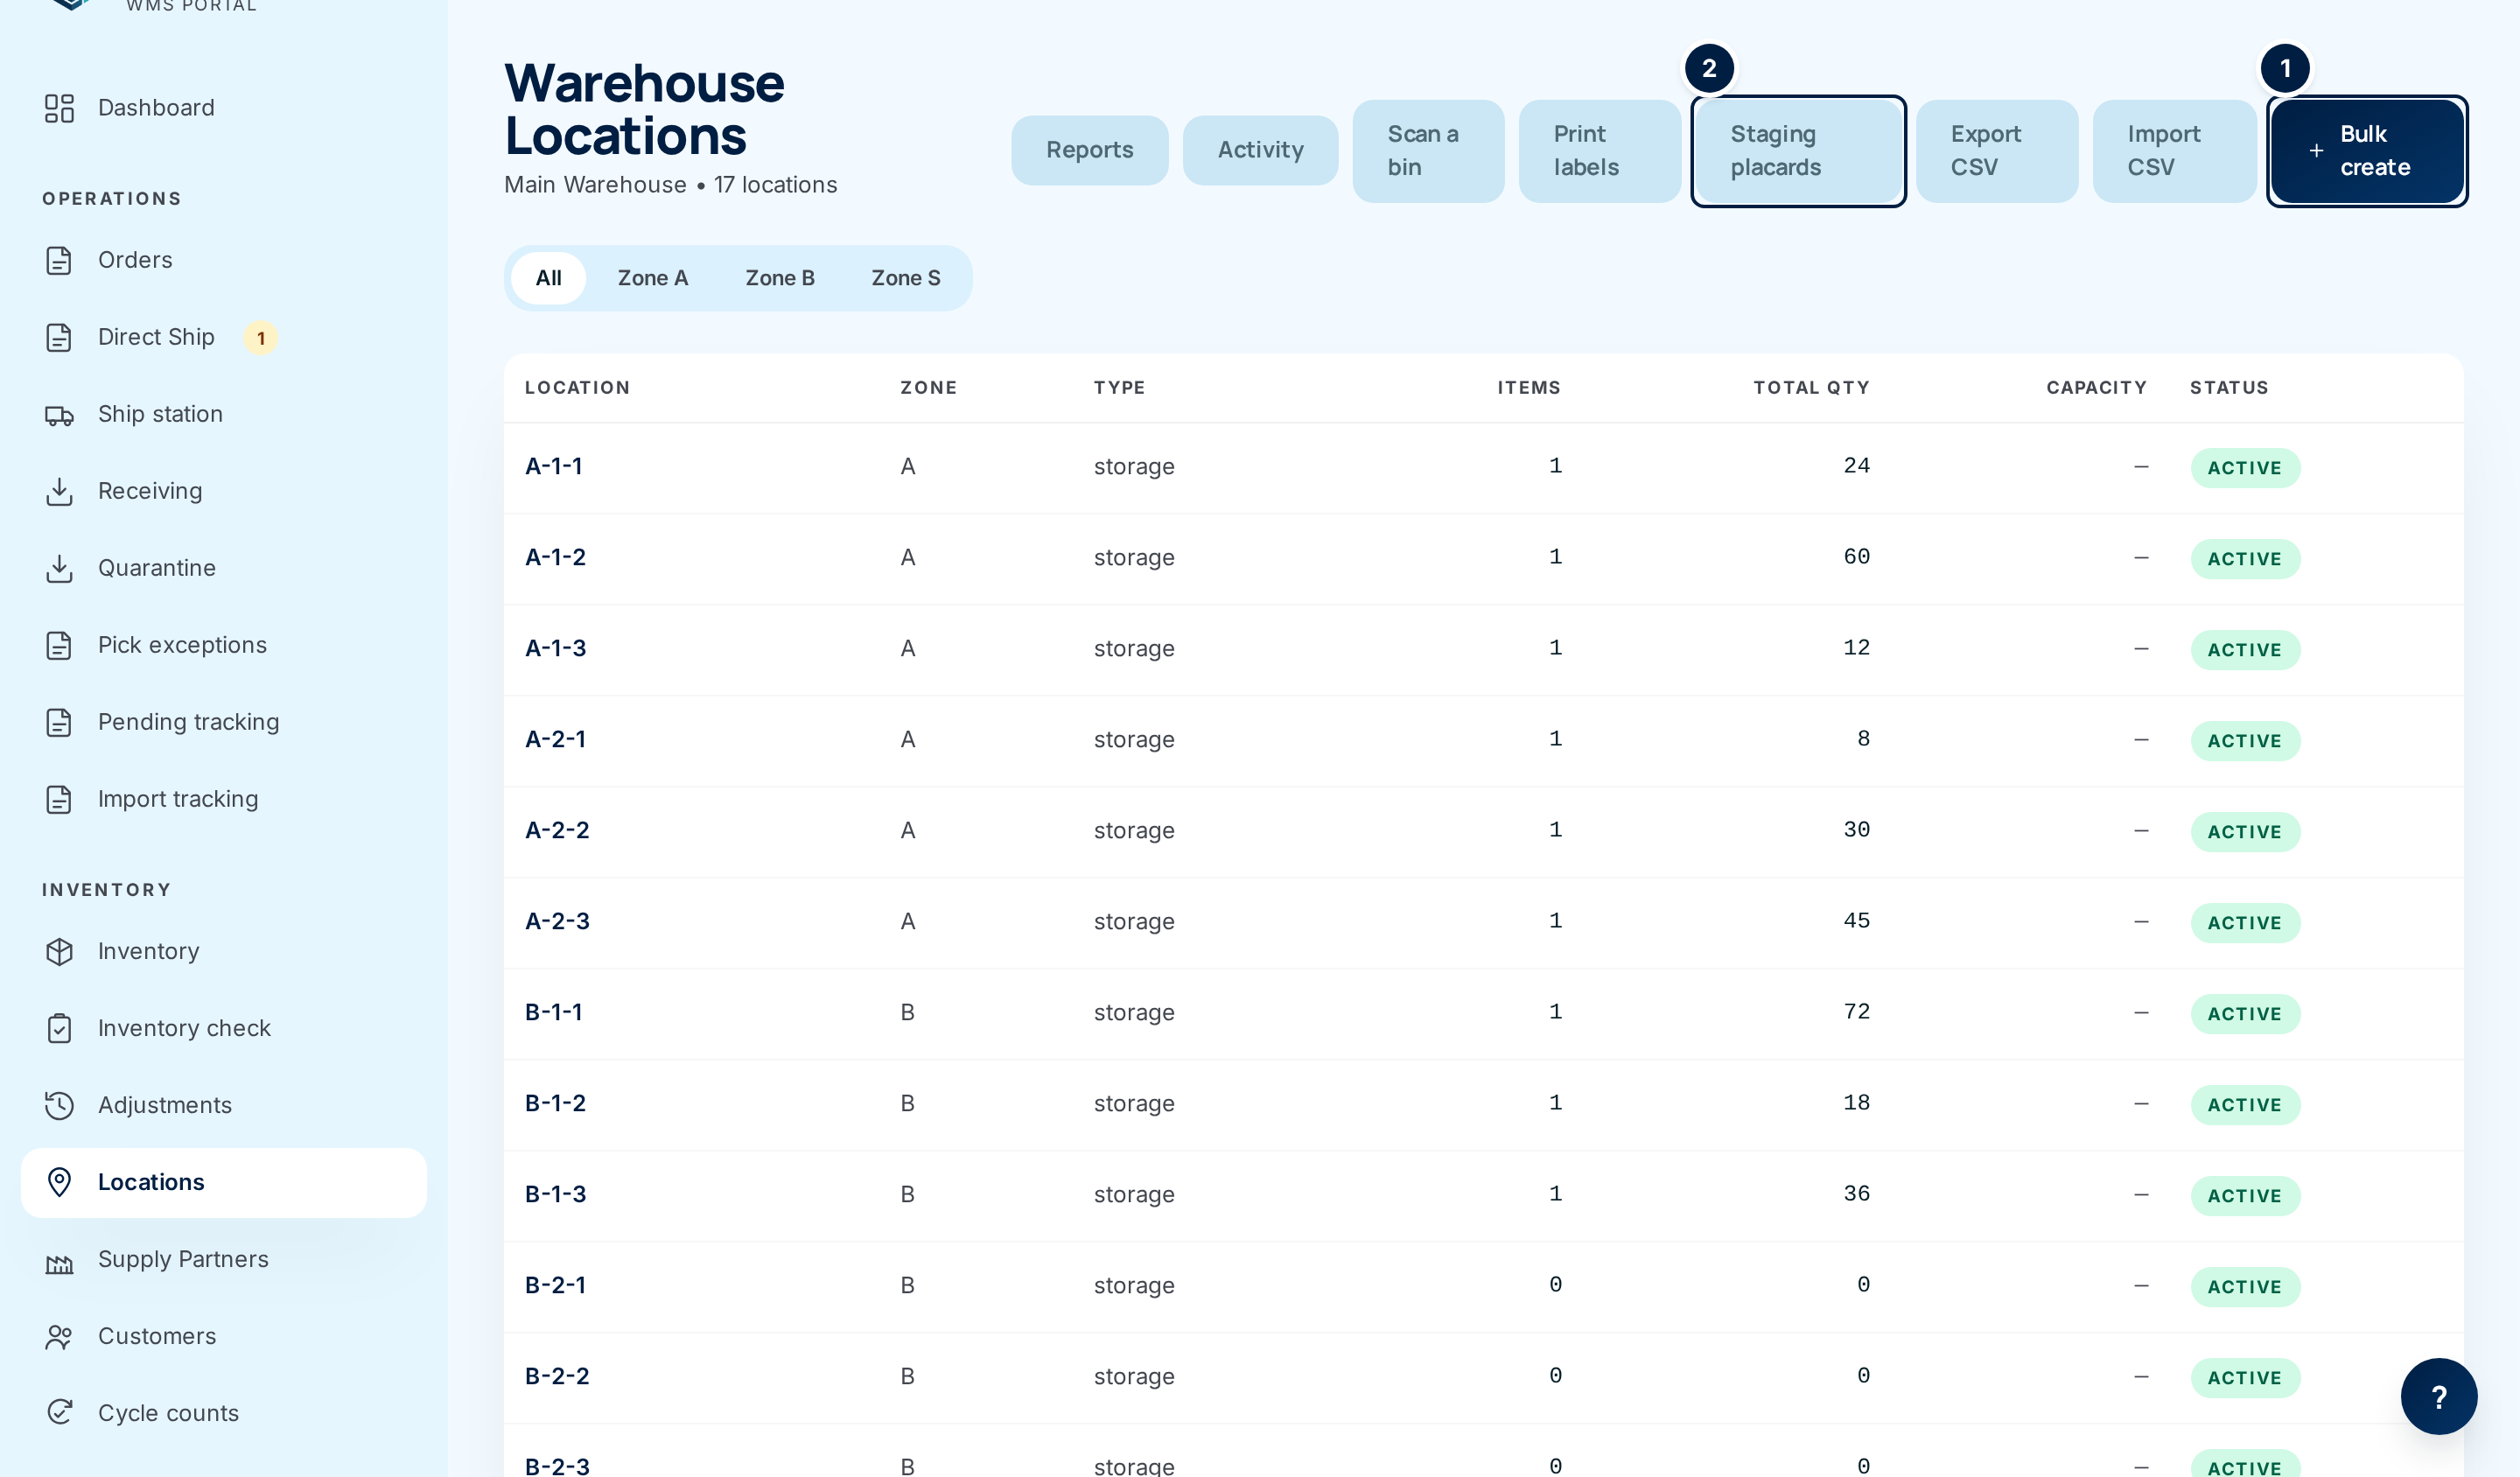
Create the areas. Open Locations from the Inventory section of the sidebar and choose Bulk create ①. Enter the range you want (for example zone S, rack 1 to 4), set Type to Staging, choose Preview, then create them. Keep the codes short. Pickers tap them and packers read them from across the room.
-
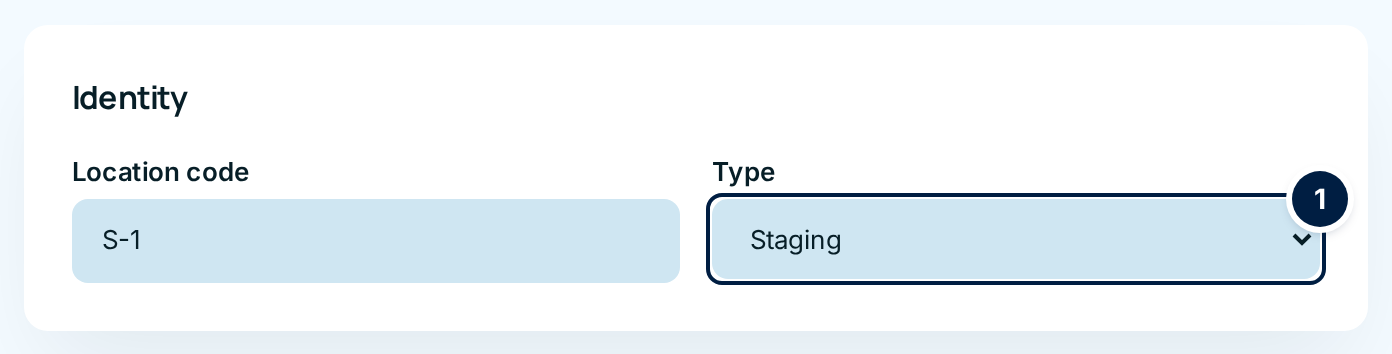
Or turn an existing location into an area. Open the location, choose Edit, and change Type ① to Staging. Save.
-
Print the placards. Back on Locations, choose Staging placards ②. ConsignTrak opens a label sheet with a barcode label for each staging location. Tape each one where its stack will sit. The button appears only once at least one staging location exists.
-
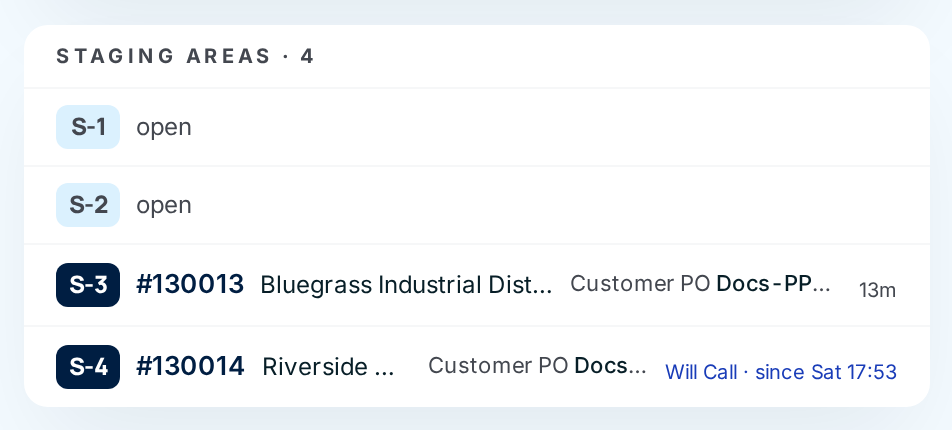
Watch the areas from the Ship station. Open Ship station from the Operations section of the sidebar. The Staging areas panel lists every area in order, with what's sitting on it.
-
Clear an area after a cancellation. If an order is cancelled while its stack is still on an area, the row turns amber: needs clearing — order #… cancelled. Once someone has put the goods back on the shelf, choose Restocked. The button asks you to click again. Click it a second time to confirm.
Every field and option
Locations screens
| Field or control | What it means | Required | Default | What changes when you set it |
|---|---|---|---|---|
| Bulk create | Makes a run of locations in one go from hierarchy ranges. | — | — | Opens Bulk Create Locations. |
| Type (bulk create or edit) | What the location is for: Storage, Staging, Receiving or Shipping. | Yes | Storage | Staging makes it a place pickers can set orders down. Shipping makes it a shipping lane, a place packed cartons wait for the truck. |
| Staging placards | A printable label sheet for every staging location. | — | — | Opens in a new tab, ready to print. |
Setting up locations in general is covered in Locations.
Staging areas panel (Ship station)
| Field or control | What it means | Required | Default | What changes when you set it |
|---|---|---|---|---|
| Area code (for example S-3) | The area's location code. Filled navy when something is on it, amber when it needs clearing, grey when open. | — | — | Read-only. |
| #order number (link) | The order whose stack is on the area, followed by the customer and any customer PO or supply-partner order number. | — | — | Opens the order. |
| Age (for example 1m, 3h) | How long the stack has been sitting there. | — | — | Read-only. After two hours an order still waiting for the packer turns amber with a warning sign. |
| Will Call · since … | A will-call order waiting for the customer. Waiting is normal for these, so they never turn amber. | — | — | Read-only. |
| open | Nothing on this area. | — | — | Read-only. |
| retired | The location has been retired but still has a stack on it. Pickers won't be offered it again. | — | — | Read-only. |
| needs clearing — order #… cancelled | A cancelled order's goods are still on the area and need to go back to the shelf. | — | — | Read-only. |
| Restocked | Confirms the cancelled order's goods were returned to the shelf. Asks you to click again. | — | — | The area shows open again. No stock moves, because the goods never left stock. |
What happens next
- Where the area shows up. Once a picker stages an order, the area appears on the packer's screen and pack queue, as picked to S-1 on the Ship station queue, and on the order's Tracking table.
- On the printed release. Print the release again after staging (see Reprinting documents) and it carries STAGED IN AREA: S-3 in bold under the order details. If the packer moved the cartons to a shipping lane, it reads IN SHIPPING LANE: and the lane code instead. After shipping, the line no longer prints.
- The area frees itself when the order is packed, picked up, shipped or cancelled. Will-call stacks keep their area until the customer collects them.
- The dashboard flags slow stacks. An order staged for more than two hours without being packed shows under Attention as Staged >2h, not packed.
When every area is full, pickers see a warning, but ConsignTrak never stops them handing off. The intended response is for a picker to help pack until an area frees up.
Common problems
Pickers aren't asked for an area. — No active staging location exists. Create one, or check that yours isn't retired.
There's no Staging placards button. — It appears only after the first staging-type location exists.
A stack is on the table but the panel says open. — The picker chose Handed directly to packer instead of an area. The order's Tracking table shows direct handoff.
An area stays amber with "needs clearing". — The order was cancelled after picking. Put the goods back, then choose Restocked.