Attaching files to an order
What this is
Every order has an Attachments card for its paperwork: the customer's PO, a bill of lading, a signed delivery receipt. Orders with warehouse lines also have a Supply Partner Packing List card. The file you put there is printed at the pack station and goes in the box. Office staff use both cards on a desktop.
Before you start
- Role: Office or Administrator. Warehouse users can upload too, but can't remove files.
- Settings: none.
- You'll need: the order, already entered (any status, including shipped), and the file saved on your computer. See Files ConsignTrak accepts.
Step by step
-
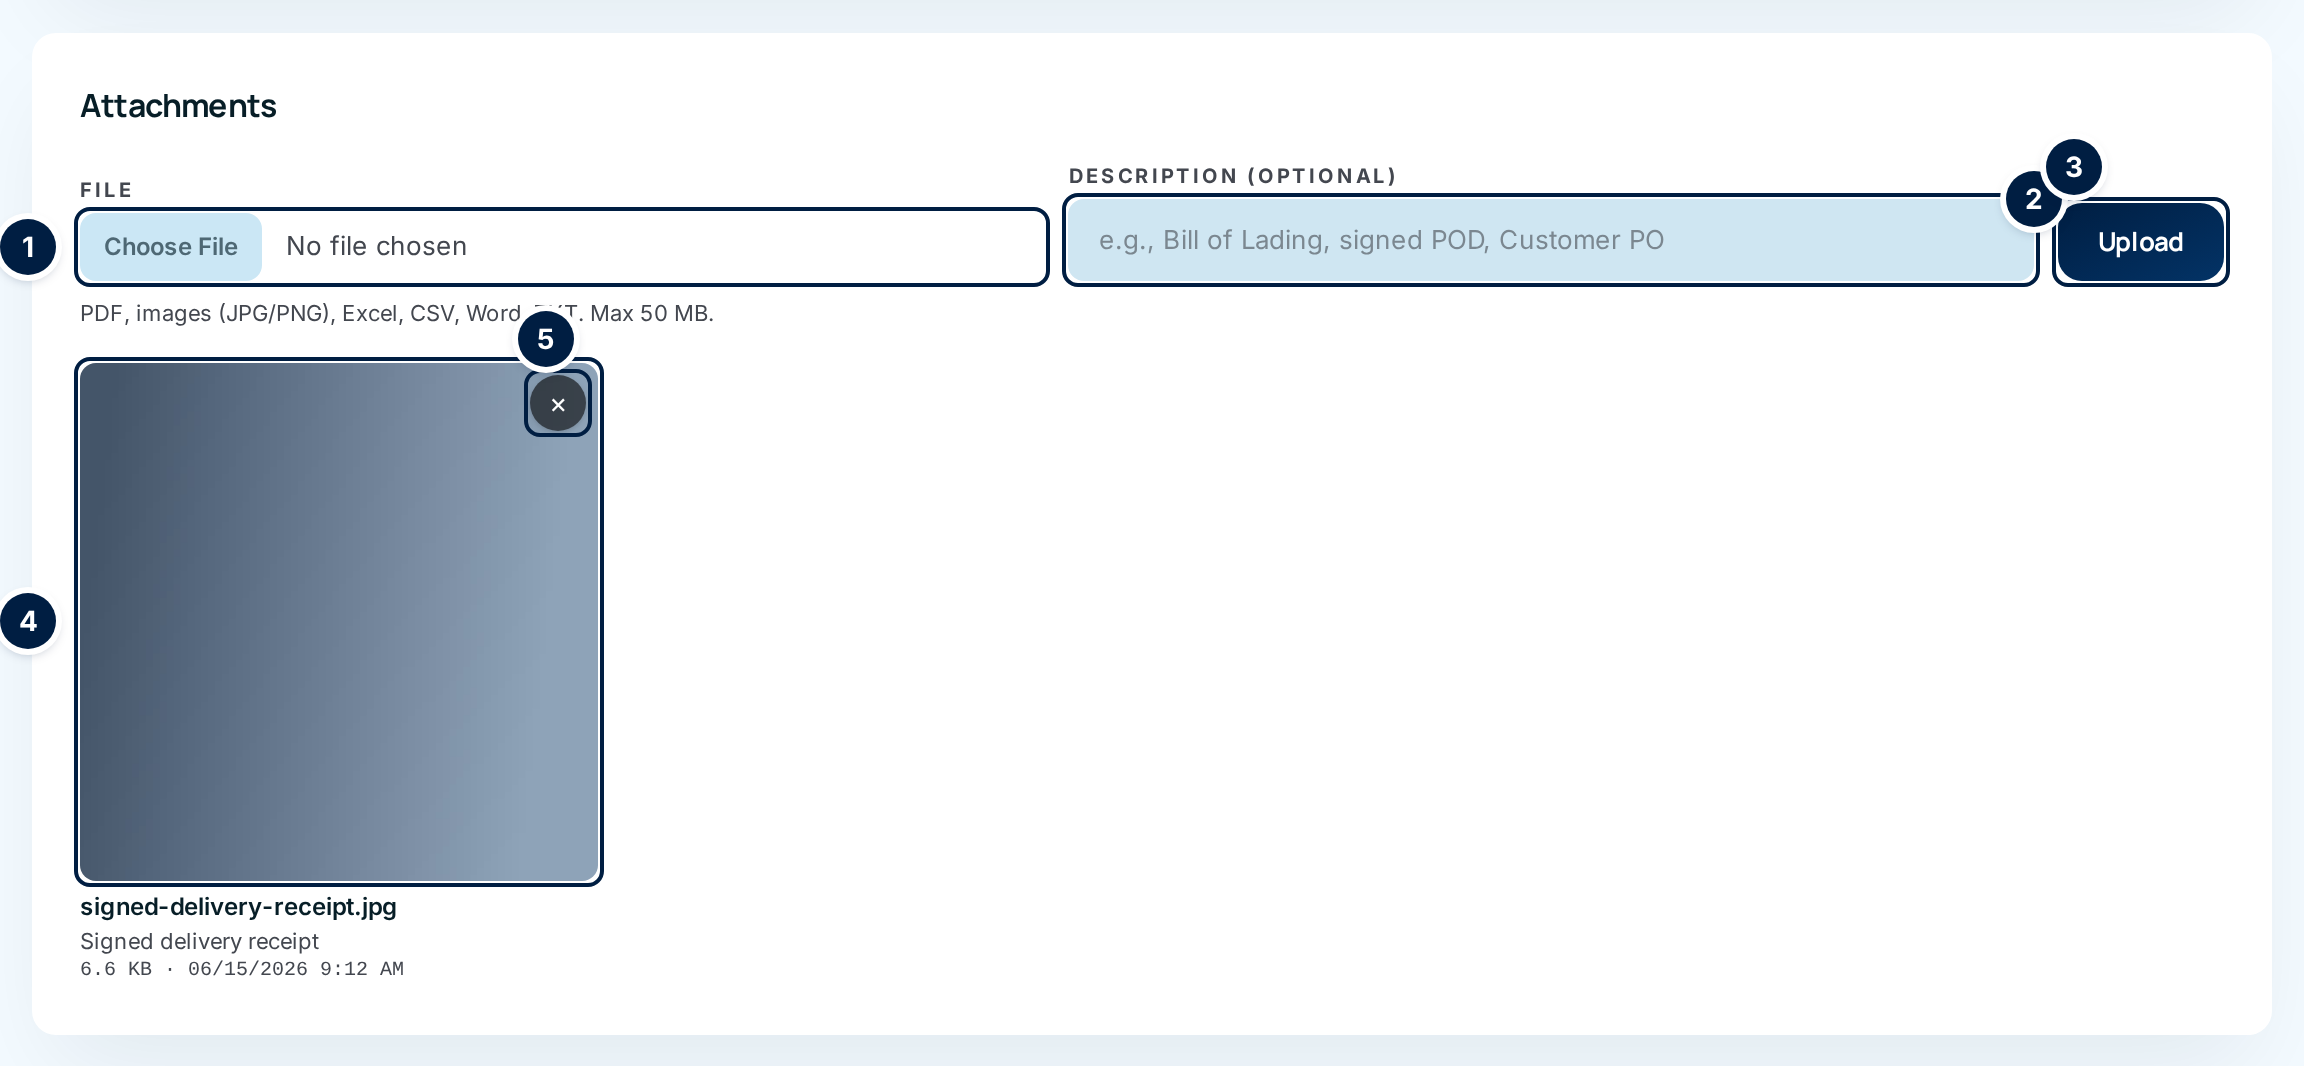
Open the order. Choose Orders in the sidebar, then the order. Scroll down past the lines and tracking to the Attachments card.
-
Choose the file. Choose Choose File ① and pick the file on your computer.
-
Describe it (optional). Type a short label in Description ②, such as "Customer PO" or "Signed POD". Skip it if the file name already says what it is.
-
Upload it. Choose Upload ③. The page reloads and the file appears as a tile ④ under the form.
-
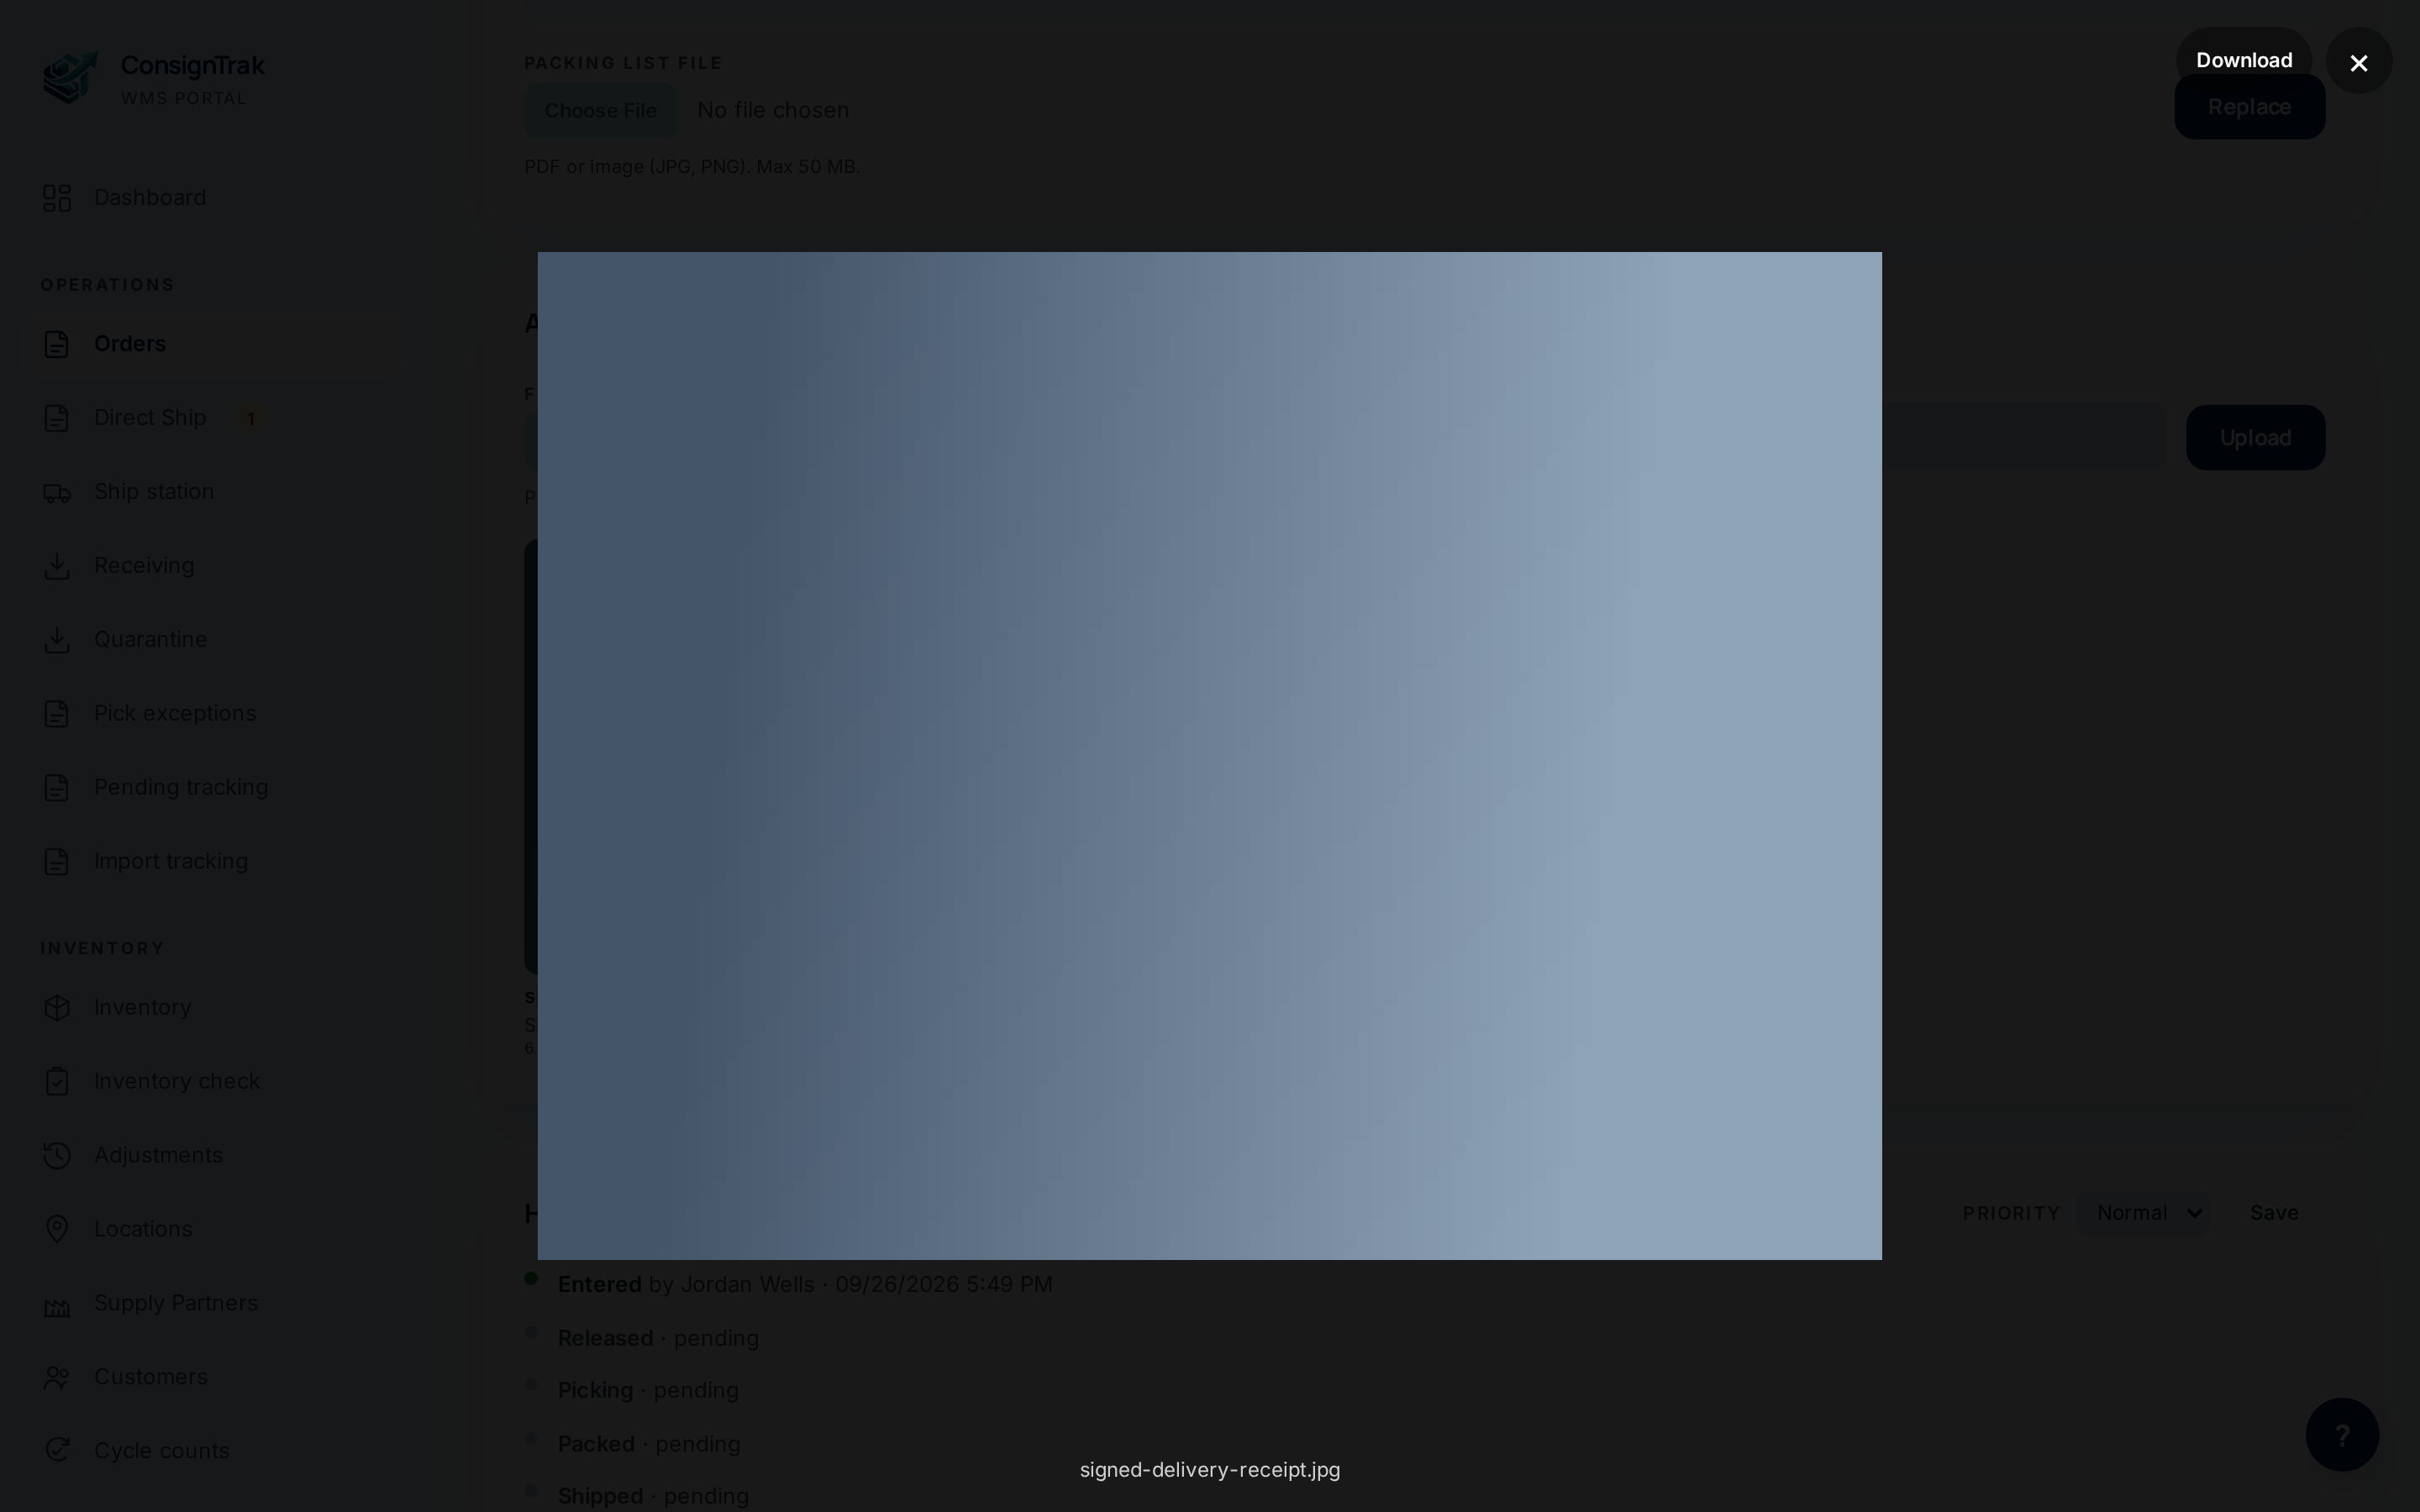
Open it. Click a photo or PDF tile to see it full size in the viewer. Use Download in the viewer's top corner to save a copy. The arrows step through the other attachments on the order. Other file types, such as a spreadsheet, download straight away.
-
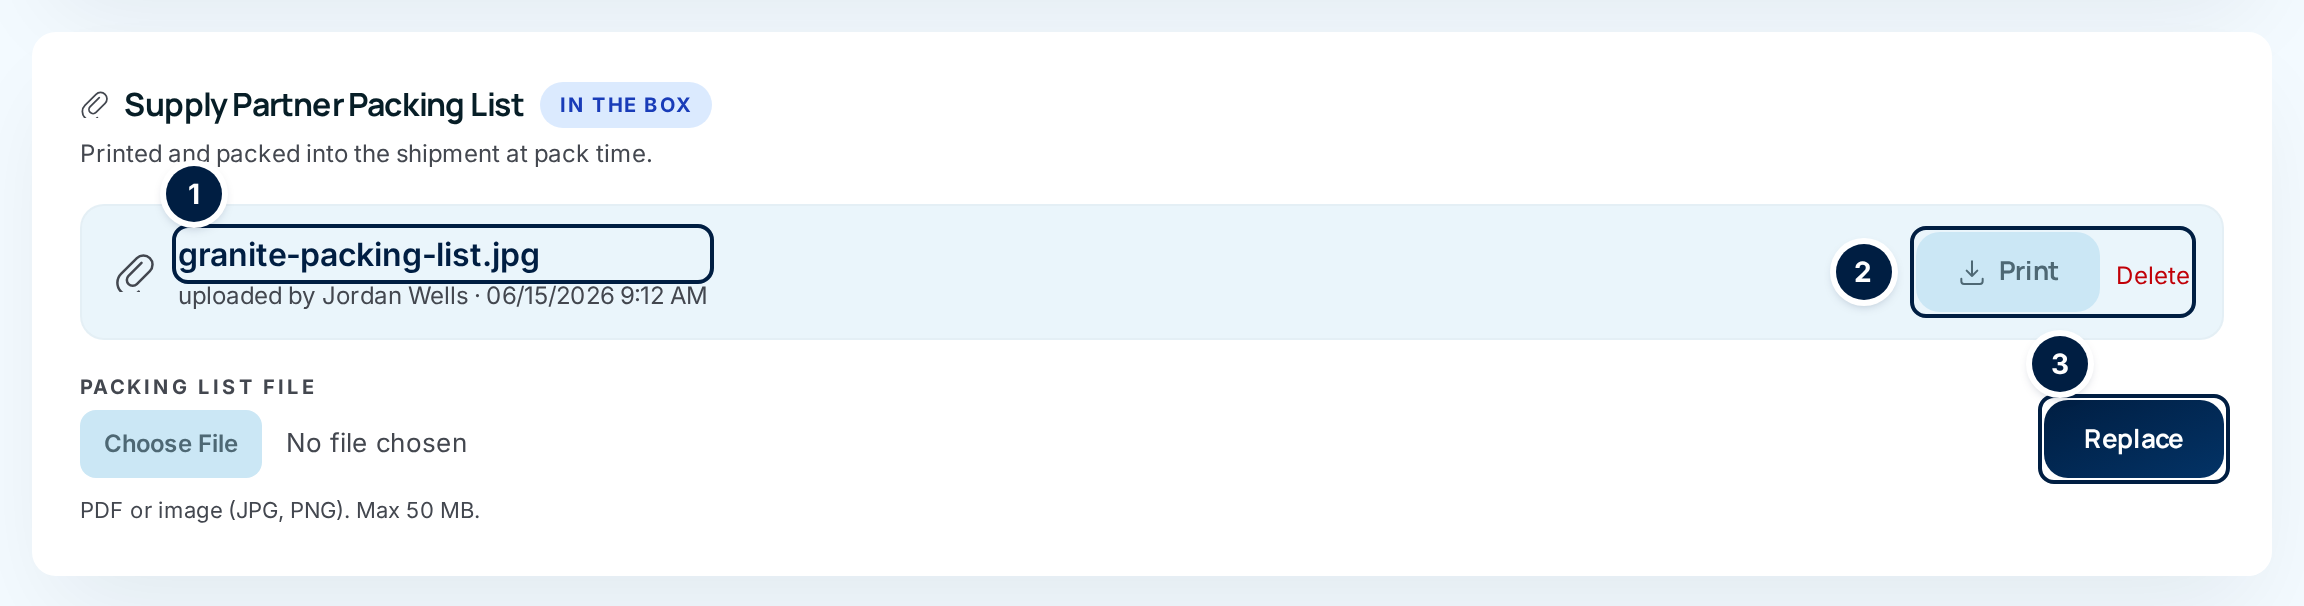
Attach the supply partner's packing list (if they sent one). In the Supply Partner Packing List card, choose the file under Packing list file and choose Attach packing list. The card then shows the file ①, with Print and Delete ②. The button becomes Replace ③.
-
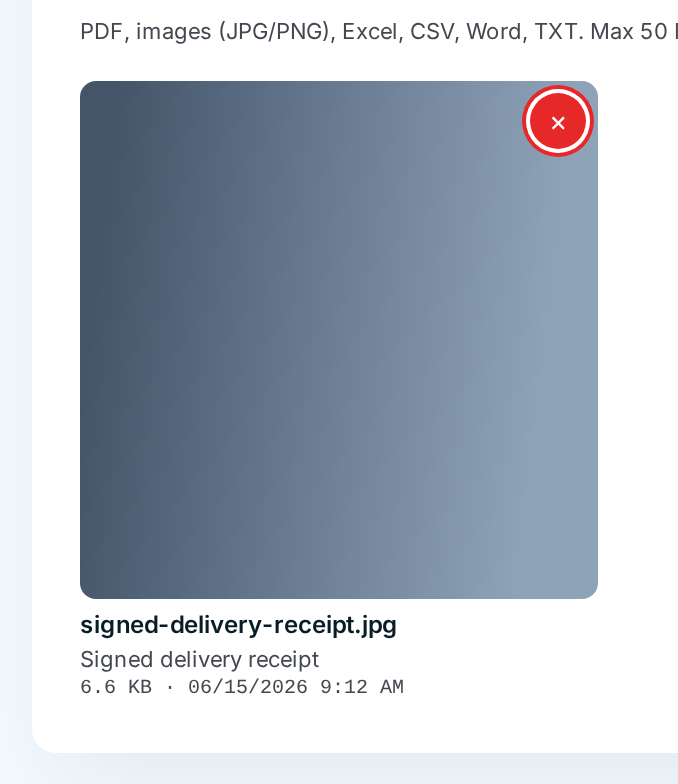
Remove a file you attached by mistake. Choose the × on the tile ⑤ in the first picture. It turns red; click it again to remove the file. Click anywhere else, or wait a few seconds, and it goes back without removing anything.
Every field and option
Attachments card
| Field or control | What it means | Required | Default | What changes when you set it |
|---|---|---|---|---|
| File (Choose File) | The file to upload from your computer. The picker shows only accepted types. | Yes | — | Nothing until you choose Upload. |
| Description (optional) | A one-line label shown under the tile. | No | Blank | Shown under the file name on the tile and on the Documents page. |
| Upload | Saves the file to this order. | — | — | The file appears as a tile; the upload is recorded in the audit trail. |
| Tile (photo or PDF) | Opens the file in the viewer. | — | — | Nothing changes. |
| Tile (other types) | Downloads the file. | — | — | Nothing changes. |
| × on a tile | Removes the file. Click twice. | — | — | The file is deleted for good and the removal is recorded. |
| File name, description, size and upload time | Shown under each tile. | — | — | Read-only. |
Viewer
| Field or control | What it means |
|---|---|
| Download | Saves a copy to your computer. |
| ‹ / › | Step to the previous or next attachment. They show only when there's more than one. |
| × (top corner) | Closes the viewer. |
Supply Partner Packing List card
| Field or control | What it means | Required | Default | What changes when you set it |
|---|---|---|---|---|
| In the box tag | Reminds you this file is packed with the shipment. | — | — | Read-only. |
| Packing list file | The supply partner's packing list: PDF, JPG or PNG. | Yes | — | Nothing until you attach it. |
| Attach packing list / Replace | Saves the file as this order's packing list. | — | — | Any earlier packing list on the order is removed, so there's only ever one. |
| File name (link) | Opens the packing list in a new tab. | — | — | Nothing changes. |
| Opens the packing list in a new tab to print. | — | — | Nothing changes. | |
| Delete | Removes the packing list. Click twice. | — | — | The file is deleted; the card shows "No packing list attached." |
What happens next
- The file stays on the order through release, picking, packing and shipping. Nothing about the order's status or stock changes.
- A packing list is offered to the packer on the phone pack screen, so it gets printed and packed into the shipment.
- On the end-of-day shipment report, each shipped order lists its attachments under Order attachments.
- Photos the warehouse takes while packing or at a will-call pickup appear on the same order, in the Pack photos and Pickup photos cards. They belong to the pick, so they're not in the Attachments card and can't be removed from here.
- Every upload and removal is recorded in the audit trail.
Common problems
"File type not allowed. Accepted: PDF, images (JPG, PNG), Excel, CSV, Word, TXT" — the file isn't one of the accepted types. Save it as a PDF (most programs can "Print to PDF") and upload that.
"File exceeds maximum size (50 MB)" or "File too large" — the file is over 50 MB. Scan at a lower resolution, or split it into two files.
"File contents do not match its extension." — the file's name says one type but the contents are another. This usually means someone renamed it. Open it and save it again in the right format.
"No file provided" — you chose Upload before choosing a file. Choose the file first.
"Access denied" after removing a file — your role can't delete files. Warehouse users see the × but can't use it (issue #1491). Ask an Office user or an Administrator.
There's no Supply Partner Packing List card. — the card appears only when the order has lines shipped from the warehouse. A direct-ship-only order has nothing to pack, so there's nothing to print.