Drop-ship locations
What this is
A drop-ship location is an address, other than the customer's own, that the warehouse ships to on the customer's behalf. Typical examples are a job site, a second plant, or the customer's own customer. You save it once on the customer, then pick it from a list whenever you enter an order.
Don't confuse this with direct ship, where the supply partner ships from its own stock. A drop-ship location still ships from the warehouse. Only the destination changes.
Before you start
- Role: Office or Administrator.
- Settings: none.
- You'll need: the customer already on file, and the full address.
Step by step
Save a location on the customer
-
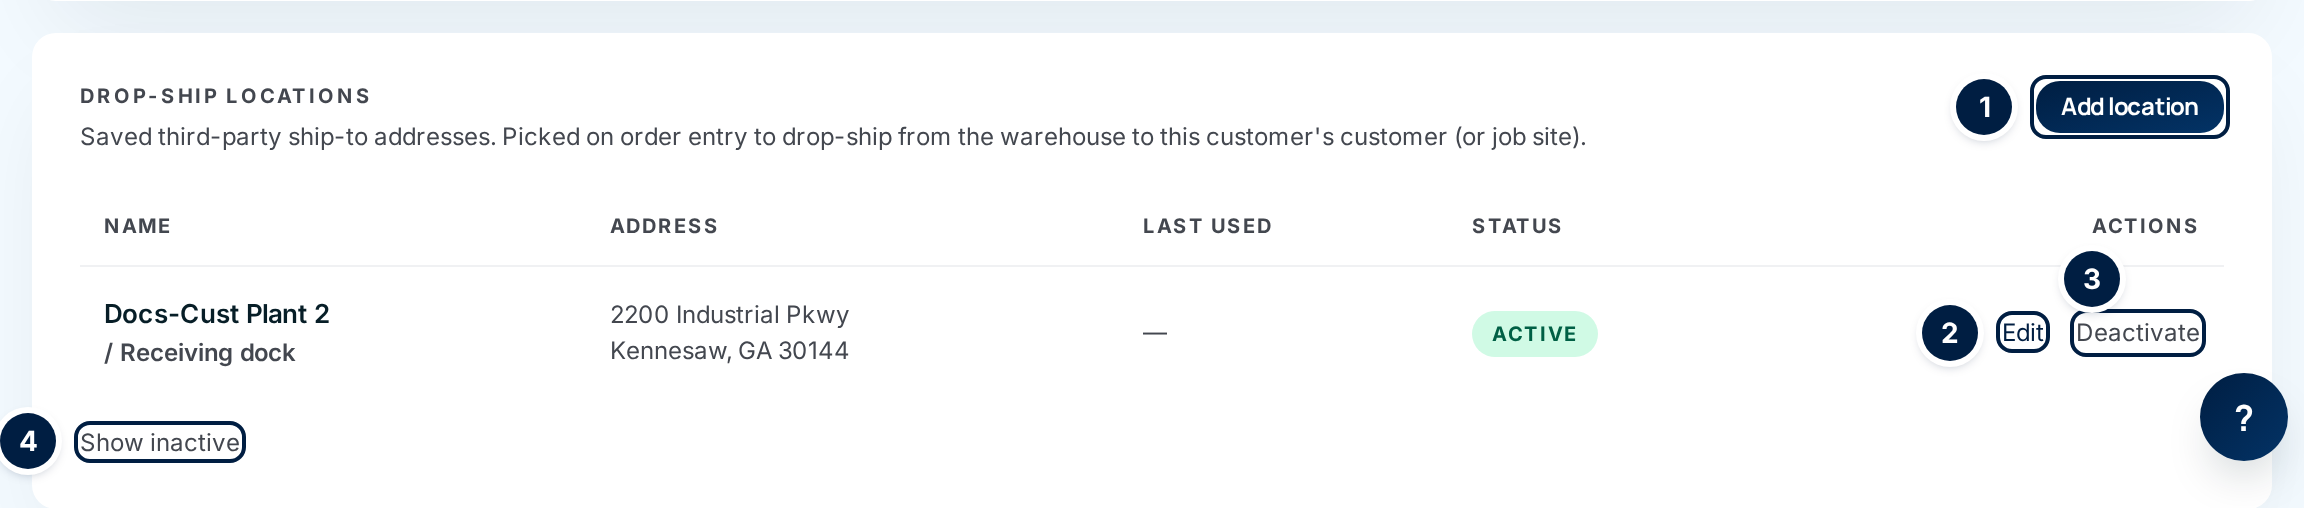
Open the customer from Customers and scroll to Drop-Ship Locations.
-
Choose Add location ①.
-
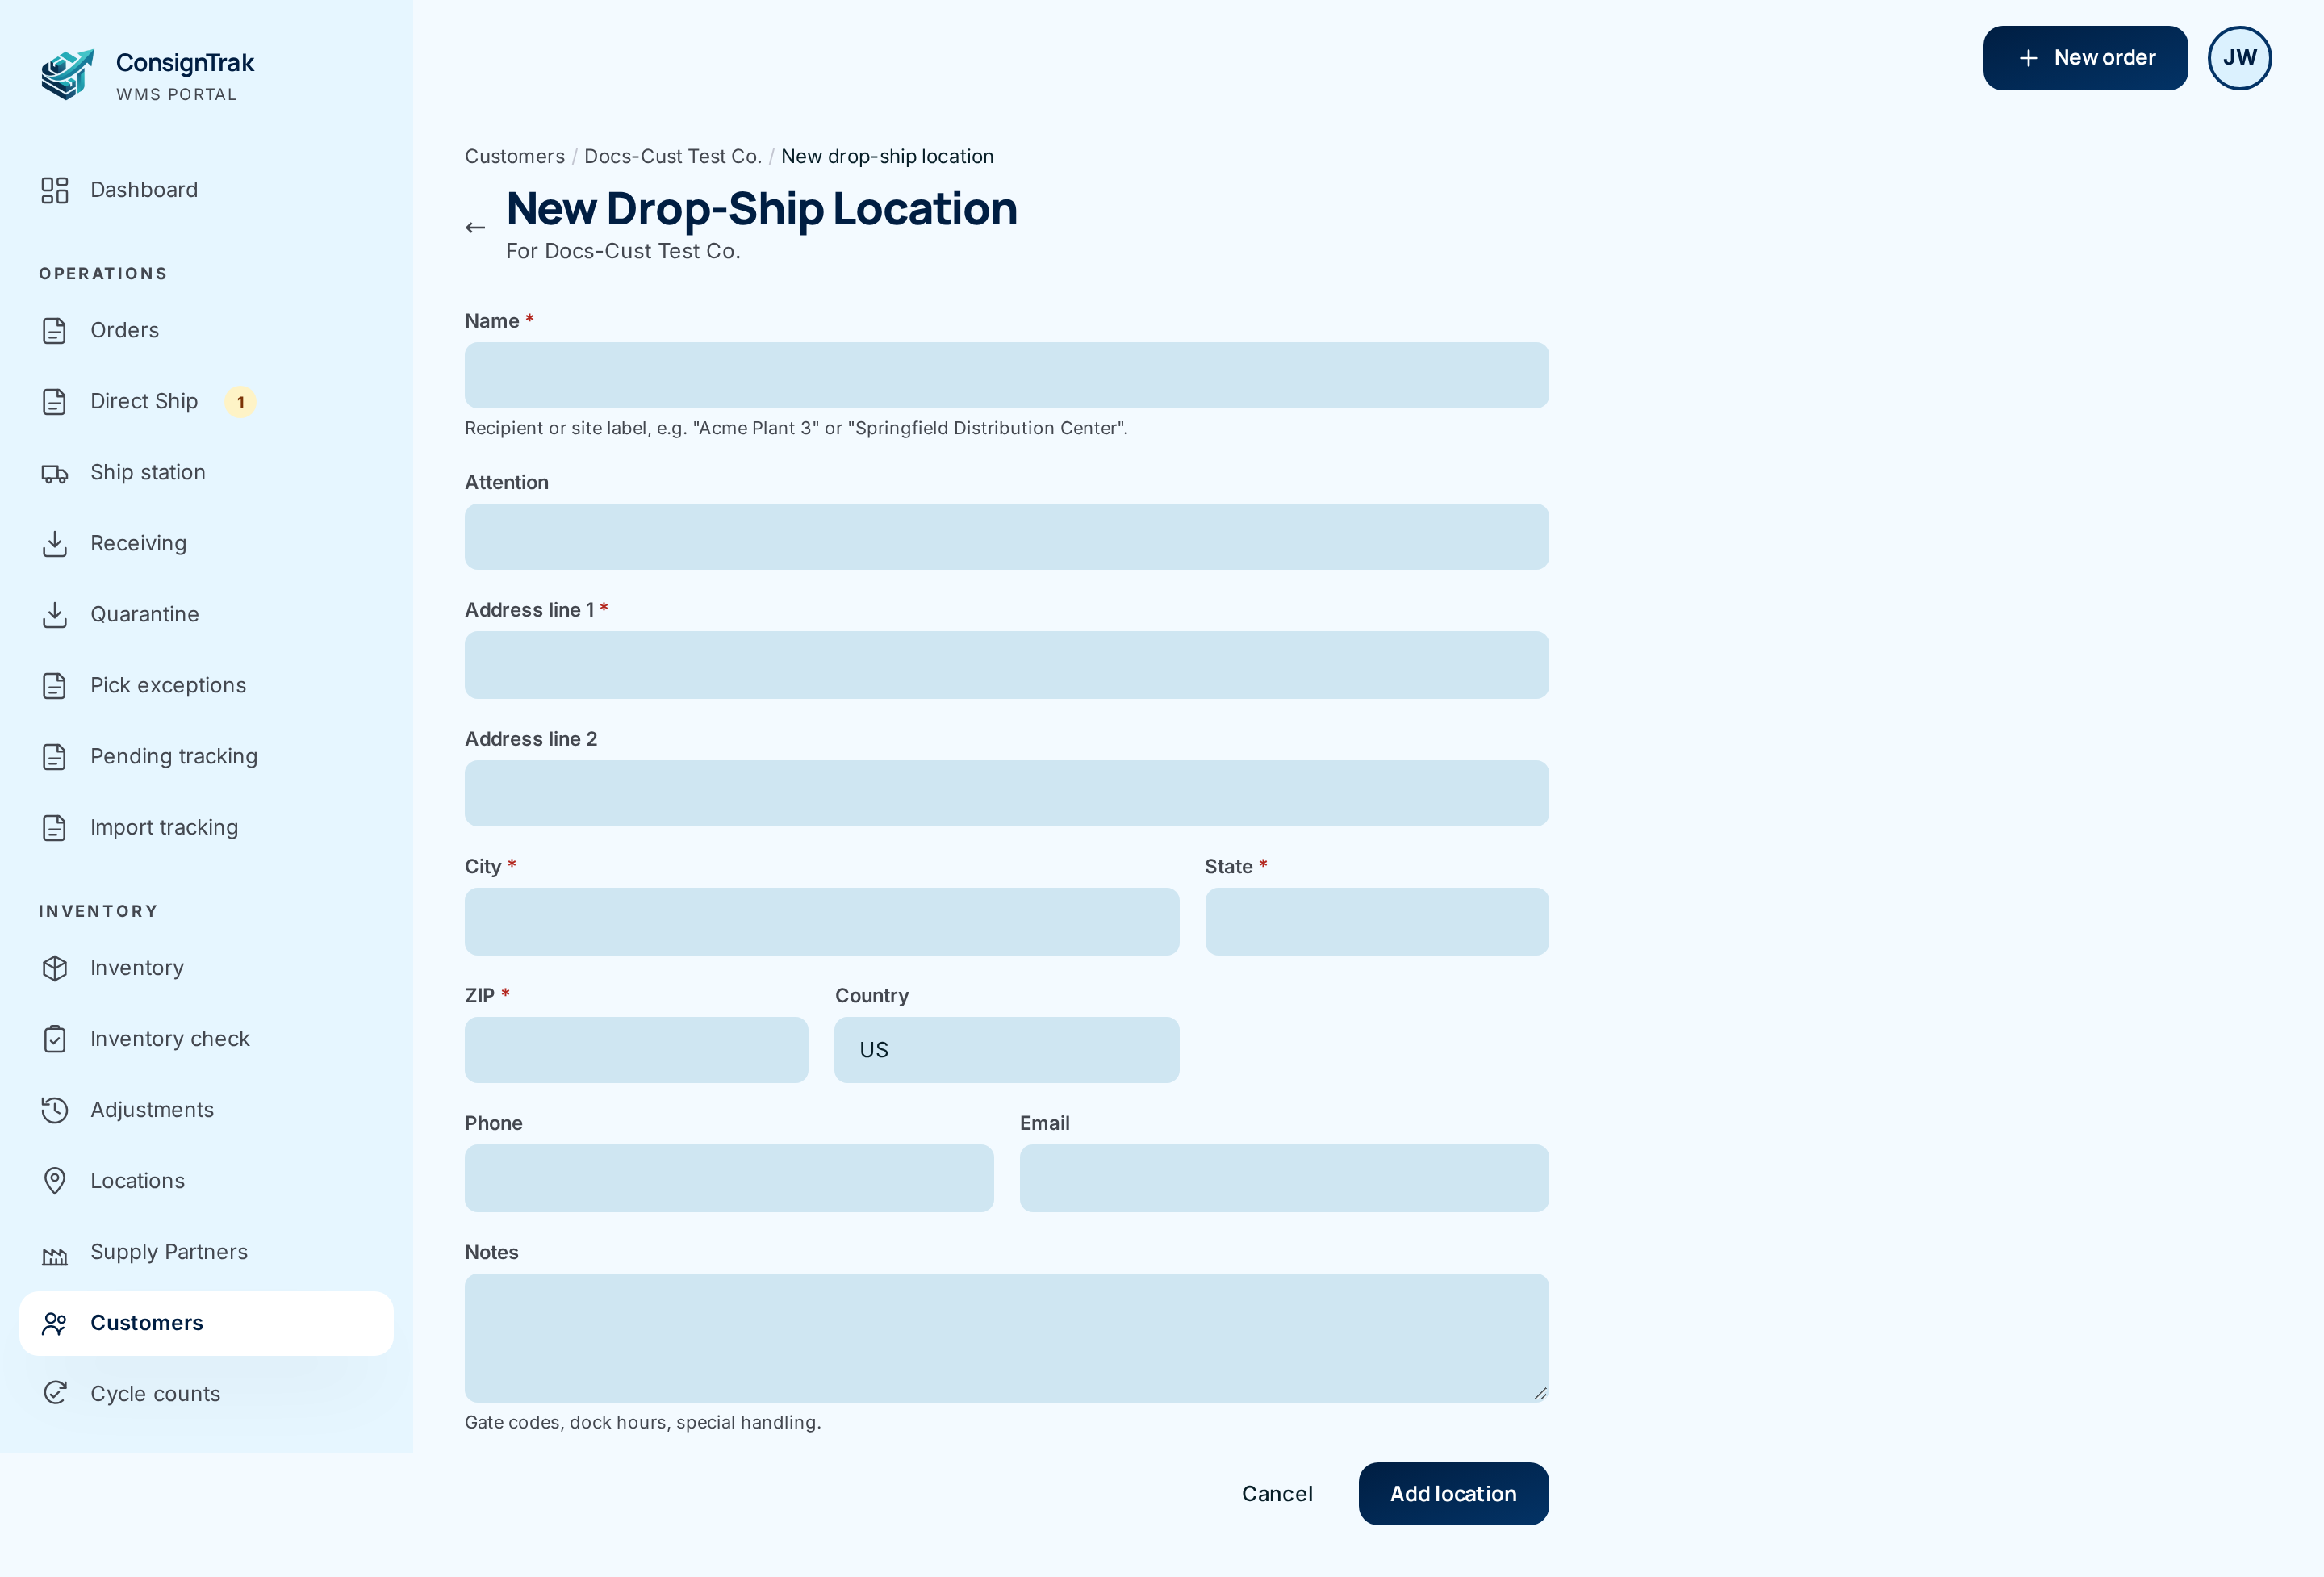
Enter the Name, the address, and anything the driver needs in Notes. Fields marked with a red star are required.
-
Choose Add location. You're back on the customer, with the new location in the list.
Pick a location on an order
-
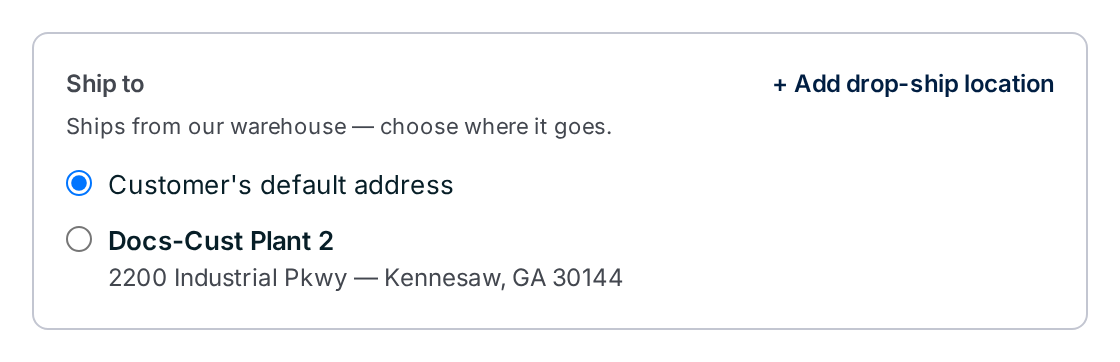
Pick the customer in order entry (see Searching and adding from order entry). A Ship to box appears under the customer.
-
Choose the location. Leave Customer's default address selected to ship to the customer's own address.
Add a location while entering an order
-
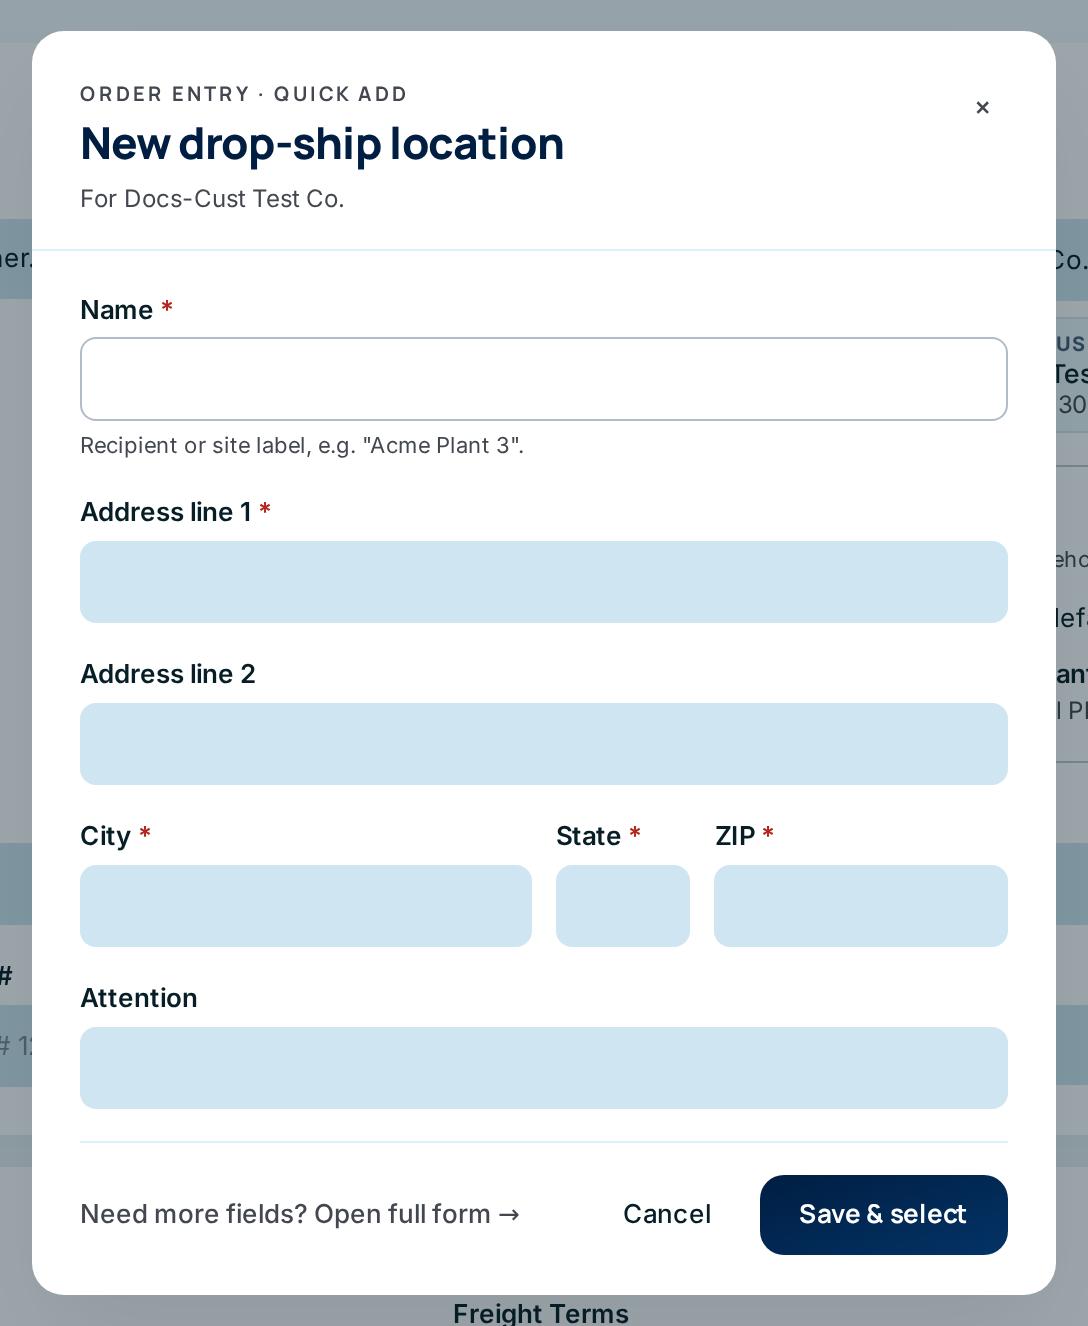
Choose + Add drop-ship location in the Ship to box.
-
Enter the name and address, then Save & select. The location is saved on the customer and picked on the order.
The quick-add window has no phone, email, country or notes fields. Use Need more fields? Open full form → for those, or edit the location later.
Change or retire a location
- Edit ② opens the same form with the current values. Choose Save.
- Deactivate ③ hides the location from new orders. The button turns amber and asks you to click again to confirm. Orders that already use it keep their address.
- Show inactive ④ lists deactivated locations too. Choose Activate on one to bring it back. Hide inactive returns to active ones only.
Every field and option
| Field or control | What it means | Required | Default | What changes when you set it |
|---|---|---|---|---|
| Name | A label for the recipient or site, such as "Acme Plant 3". | Yes | — | Shown in the list and in the order-entry Ship to box. |
| Attention | A person or department at the site. | No | — | Shown after the name, as "/ Receiving dock". |
| Address line 1 | Street address. | Yes | — | — |
| Address line 2 | Suite, building, dock. | No | — | — |
| City | — | Yes | — | — |
| State | Two-letter code. | Yes | — | — |
| ZIP | ZIP or postal code. | Yes | — | — |
| Country | Two-letter country code. | No | US | Shown in the list only when it isn't US. |
| Phone, Email | How to reach the site. | No | — | Full form only. |
| Notes | Gate codes, dock hours, special handling. | No | — | Full form only. |
| Add location / Save / Save & select | Saves the location. Save & select also picks it on the order. | — | — | — |
| Cancel / × / ← | Leave without saving. | — | — | — |
| Need more fields? Open full form → | Opens the full form from order entry. | — | — | Leaves the order. |
| Panel columns Name, Address, Last used, Status | Last used is the date of the last order entered with this location. Status is Active or Inactive. | — | — | Read-only. |
| Edit, Deactivate, Activate | See the steps above. | — | — | Deactivate asks you to click again. |
| Show inactive / Hide inactive | Include or hide deactivated locations. | — | Hidden | — |
| Ship to box (order entry) | Customer's default address or one saved location. | — | Default address | The order ships to the chosen address. |
| + Add drop-ship location (order entry) | Opens the quick-add window. | — | — | — |
What happens next
- The chosen address is copied onto the order and printed on the release as the ship-to. Editing the location later doesn't change orders already entered.
- The location's Last used date updates when the order is created, and the most recently used locations are listed first.
- The warehouse picks and ships from its own stock as usual.
Common problems
"Please fix the following:" with name is required, address line 1 is required, city is required, state is required or zip code is required — Fill in the listed fields and save again.
The location doesn't appear on the order. — It's deactivated, or it belongs to a different customer. Open the customer, choose Show inactive and Activate it.
No Ship to box on the order. — Pick the customer first. The box loads after a customer is selected.